3.10. Adding a Service to the Cluster
To add a service to the cluster, follow these steps:
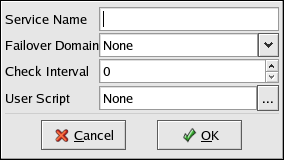
Select the Services tab and click New. The Service dialog is displayed as shown in Figure 3-18.
Give the service a descriptive Service Name to distinguish its functionality relative to other services that may run on the cluster.
If you want to restrict the members on which this service is able to run, choose a failover domain from the Failover Domain list. (Refer to Section 3.9 Configuring a Failover Domain for instructions on how to configure a failover domain.)
Adjust the quantity in the Check Interval field, which sets the interval (in seconds) that the cluster infrastructure checks the status of a service. This field is only applicable if the service script is written to check the status of a service.
Specify a User Script that contains settings for starting, stopping, and checking the status of a service.
Specify service properties, including an available floating IP address (an address that can be transferred transparently from a failed member to a running member in the event of failover) and devices (which are configured as children of the service). For instructions, refer to Section 3.10.1 Adding a Service IP Address and Section 3.10.2 Adding a Service Device.
When finished, click OK.
Choose File => Save to save the changes to the cluster configuration.
The following sections describe service configuration in more detail.
3.10.1. Adding a Service IP Address
To specify a service IP address, follow these steps:
On the Services tab of the Cluster Configuration Tool, select the service you want to configure and click Add Child.
Select Add Service IP Address and click OK.
Specify an IP address (which must be resolvable by DNS but cannot be the IP address of a running service).
Optionally specify a netmask and broadcast IP address.
Choose File => Save to save the change to the /etc/cluster.xml configuration file.
3.10.2. Adding a Service Device
To specify a device for a service, follow these steps:
On the Services tab of the Cluster Configuration Tool, select the service you want to configure and click Add Child.
Select Add Device and click OK.
Specify a Device Special File (for example, /dev/hda7) and a mount point (for example, /mnt/share). Each device must have a unique device special file and a unique mount point within the cluster.
Specify a Samba Share Name for the device if it is intended to be a Samba export directory. If a Samba Share Name has been entered, when the user selects File => Save, a /etc/samba/smb.conf.sharename file is created (where sharename is the name of the Samba share), and will be used by Samba when the cluster starts the service. For each Samba share you create, an /etc/samba/smb.conf.sharename is created. Copy all of these files to the other cluster members before initializing the cluster service on those members. For more information about configuring a Samba share, refer to Section 6.6 Setting Up a Samba Service.
Specify a directory from which to mount the device in the Mount Point field. This directory should not be listed in /etc/fstab as it is automatically mounted by the Red Hat Cluster Manager when the service is started.
Choose a file system type from the FS Type list.
Optionally specify Options for the device. If you leave the Options field blank, the default mount options (rw,suid,dev,exec,auto,nouser,async) are used. Refer to the mount man page for a complete description of the options available for mount.
Check Force Unmount to force any application that has the specified file system mounted to be killed prior to disabling or relocating the service (when the application is running on the same member that is running the disabled or relocated service).
When finished, click OK.
Choose File => Save to save the change to the /etc/cluster.xml configuration file.