12.2. Viewing Images
This section discusses some of the common tools for viewing image files. Red Hat Enterprise Linux contains light, fast applications that display images as well as full-featured applications that display and edit images.
12.2.1. Nautilus
As discussed in Section 2.1 Using Nautilus, Nautilus displays image files as thumbnails. To view a larger display of the image, double-click on the thumbnail. Nautilus opens the file in the default image viewing application, Eyes of GNOME.
12.2.2. gThumb
gThumb is a powerful image viewer for graphical desktop users that supports several image file formats.
gThumb is useful for viewing individual image files as well as browsing collections of files in folders. It supports zoom in and zoom out functions, as well as thumbnails of all image files within a directory. It also supports several advanced options not found in Nautilus.
gThumb can be started from your desktop panel by selecting Applications => Graphics => Photo Tool. Start the application from a shell prompt by entering the command gthumb. gThumb will browse your user home directory by default. If you have any images in this directory, the gallery panel will automatically generate thumbnails in the main display area.
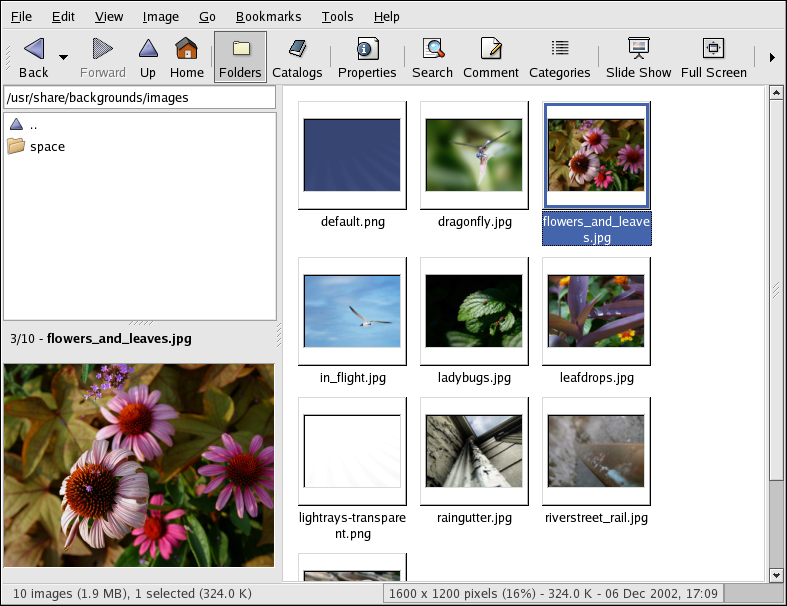
The gThumb interface has a text field for you to enter a particular path to your image directories. Right-clicking on an image in the display area opens a pop-up menu of file management options such as renaming, moving, copying, and converting an image from one file format to another. You can also set an image as your desktop wallpaper within the pop-up menu.
You can combine functions within
gThumb and create a dynamic
presentation effect for groups of images within a directory.
In the text field below the toolbar, type the path to the
directory where your images are located and highlight the
first image in the main gallery panel. Clicking the
Slide Show button on the toolbar starts
a full-screen slide show. By default, each image in the slide
show is presented for 4 seconds. You can stop the slide show
at any time by pressing
12.2.3. GIMP
To start the GIMP, select Applications => Graphics => The GIMP. The first time the application starts, you must go through an installation process. Select Continue to accept the default options of the installation. Once the GIMP has installed, use it to display your image file by selecting File => Open and navigating to the file on your system. Double-click on the file to display it.