Chapter 19. Network Configuration
To communicate with other computers, computers need a network connection. This is accomplished by having the operating system recognize an interface card (such as Ethernet, ISDN modem, or token ring) and configuring the interface to connect to the network.
The Network Administration Tool can be used to configure the following types of network interfaces:
Ethernet
ISDN
modem
xDSL
token ring
CIPE
wireless devices
It can also be used to configure IPsec connections, manage DNS settings, and manage the /etc/hosts file used to store additional hostnames and IP address combinations.
To use the Network Administration Tool, you must have root privileges. To start the application, go to the Main Menu Button (on the Panel) => System Settings => Network, or type the command redhat-config-network at a shell prompt (for example, in an XTerm or a GNOME terminal). If you type the command, the graphical version is displayed if X is running, otherwise, the text-based version is displayed. To force the text-based version to run, use the redhat-config-network-tui command.
To use the command line version, execute the command redhat-config-network-cmd --help as root to view all the options.
If you prefer modifying the configuration files directly, refer to the Red Hat Enterprise Linux Reference Guide for information on their locations and contents.
 | Tip |
|---|---|
Go to the Red Hat Hardware Compatibility List (http://hardware.redhat.com/hcl/) to determine if Red Hat Enterprise Linux supports your hardware device. |
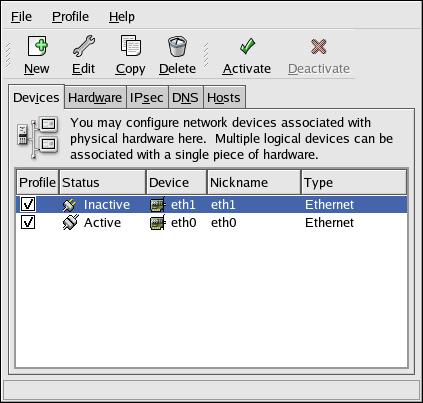
19.1. Overview
To configure a network connection with the Network Administration Tool, perform the following steps:
Add a network device associated with the physical hardware device.
Add the physical hardware device to the hardware list if it does not already exist.
Configure the hostname and DNS settings.
Configure any hosts that cannot be looked up through DNS.
This chapter discusses each of these steps for each type of network connection.